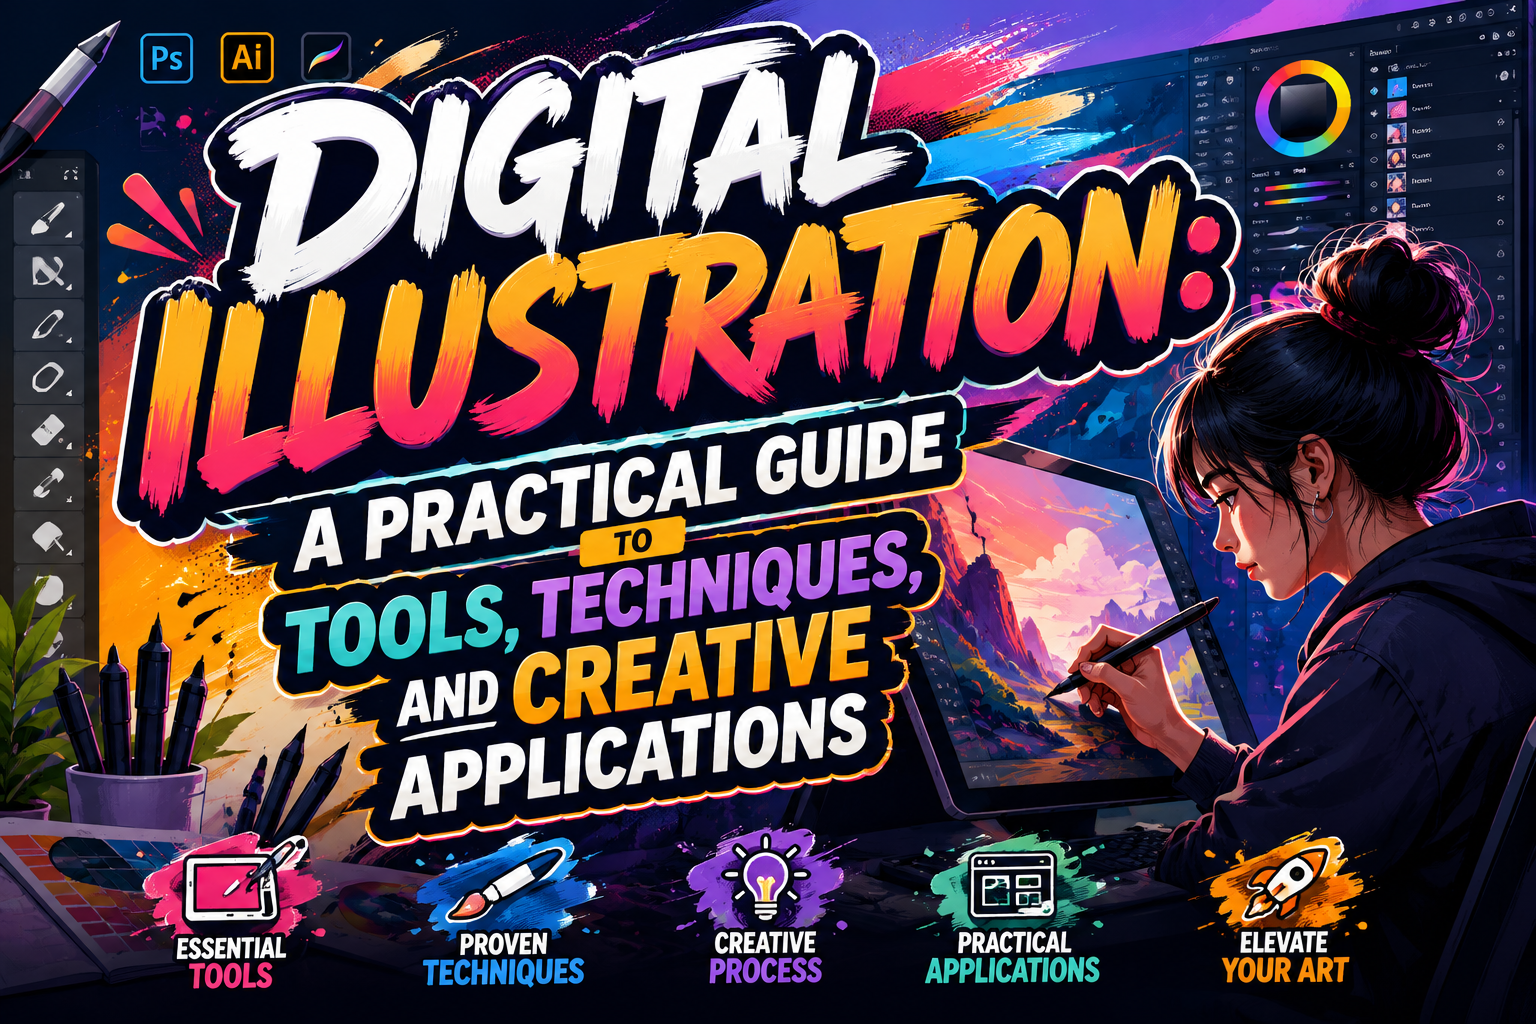
The best way to begin Digital illustration is to decide where the finished artwork will appear. A social media graphic, book cover, mobile-game character, packaging illustration, and large exhibition poster require different dimensions, levels of detail, file structures, and export formats.
Before drawing, write a compact creative brief containing:
- The intended audience
- The central message
- The desired emotional response
- The final output size
- Digital, print, or mixed distribution
- Required colors and brand assets
- Text or typography that must be included
- The deadline and revision process
A character illustrator may need expressive poses and detailed rendering. A packaging designer may prioritize a recognizable silhouette and artwork that remains clear at a small size. A branding project may require a flexible illustration system rather than one isolated image.
Choosing the destination first prevents the artist from creating beautiful work that cannot be adapted to its real application.
What Is Digital Illustration?
Digital illustration is the creation of visual artwork using computers, tablets, drawing displays, styluses, and creative software. The process can imitate traditional media such as pencil, ink, watercolor, oil paint, collage, or airbrush, but it can also produce visual styles that are difficult to create physically.
Unlike a photograph, an illustration interprets a subject through deliberate choices involving shape, composition, color, texture, lighting, and visual exaggeration. The artist decides what to simplify, emphasize, remove, or transform.
Digital illustration can be used for:
- Branding
- Advertising
- Editorial content
- Book and magazine publishing
- Packaging
- Social media
- Character design
- Concept art
- Games
- Animation
- Posters
- Infographics
- Merchandise
- User-interface graphics
- Educational materials
Its main advantage is flexibility. Artists can work with layers, revise colors, rearrange compositions, create multiple versions, and prepare the same concept for several outputs without rebuilding everything from the beginning.
Raster, Vector, and Hybrid Illustration
Raster Illustration
The Raster artwork is made from pixels. It is especially useful for painterly images, detailed shading, textured brushes, atmospheric lighting, and artwork that imitates traditional media.
Because a raster file contains a fixed pixel grid, enlarging it too far can produce blurred or jagged edges. Adobe describes raster images as particularly suitable for complex color, lighting, and shading, while noting that they lose quality when scaled beyond their available resolution.
Raster illustration works well for:
- Digital painting
- Concept art
- Character rendering
- Editorial artwork
- Matte painting
- Textured posters
- Social media visuals
- Book-cover art
- Atmospheric environments
Common raster formats include PSD, PNG, JPEG, TIFF, and application-specific working files.
Vector Illustration
Vector artwork is built from mathematically defined points, curves, lines, and shapes. It can be enlarged or reduced without the pixelation associated with raster images, making it especially useful for artwork that needs to appear across many sizes.
Vector illustration works well for:
- Logos
- Icons
- Mascots
- Flat illustrations
- Infographics
- Packaging graphics
- Patterns
- Stickers
- Signage
- Branded merchandise
- Interface assets
Its clean, editable construction makes it practical for projects that require precise shapes, repeated colors, and scalable production.
Hybrid Illustration
Many professional workflows combine raster and vector methods.
An artist might create a loose sketch in a painting application, rebuild the main forms as vectors, and then add raster textures or lighting. Another illustrator may paint the entire scene with raster brushes but use vector typography, logos, and geometric overlays.
Adobe Fresco supports both painting and vector-oriented workflows, and vector-brush artwork can be transferred into Illustrator for further editing.
A hybrid approach is useful when a project needs:
- Painterly atmosphere
- Scalable brand elements
- Editable typography
- Clean logos
- Reusable shapes
- Organic texture
- Several output sizes
The correct workflow is the one that protects the intended visual quality while making future edits manageable.
Essential Digital Illustration Tools
Drawing Tablet or Pen Display
A pressure-sensitive drawing tablet allows the artist to control stroke weight, opacity, texture, and brush behavior through hand movement.
Screenless tablets are usually compact and require the artist to look at a separate monitor. Pen displays allow drawing directly on the visible artwork. Tablet computers provide a portable option for sketching, painting, and reviewing work.
A stylus is especially useful for painting, line art, and organic forms. A mouse or trackpad may still be practical for vector shapes, typography, layout, and precision editing.
Computer or Tablet
The required hardware depends on the complexity of the work.
Large canvases, numerous layers, high-resolution textures, animation, and 3D references generally require more processing power and memory than a simple social media illustration.
Artists should choose hardware according to their normal workload rather than buying the most expensive system available. A portable tablet may be enough for sketching and content creation, while a studio working on large publishing files may need a desktop workstation and calibrated display.
Color-Accurate Display
Color can change significantly between screens, printers, and materials.
A reliable display and consistent color-management process help reduce unexpected differences. For print projects, request the production specifications from the printer before finalizing the artwork.
Do not assume that a color that looks vivid on a backlit screen will reproduce identically on uncoated paper, fabric, packaging board, or merchandise.
Backup and Storage
Digital artwork should exist in more than one location.
A practical setup may include:
- Local working drive
- Automatic cloud backup
- External backup drive
- Versioned project folders
- Archived final exports
- Separate folders for licensed assets
A damaged file should not erase several days of creative work.
Popular Digital Illustration Software
Adobe Fresco, Photoshop, and Illustrator
Adobe Fresco is designed for sketching, painting, and animation, with a large brush collection and integration with other Adobe applications. And adobe currently presents Fresco as a free painting and drawing application for supported mobile devices.
Photoshop provides pixel-based painting tools, brush settings, opacity controls, and layered editing. Layers allow artists to change selected parts of an illustration without directly altering every other element.
Illustrator focuses on editable vector graphics and is commonly used for scalable illustrations, logos, icons, typography, packaging assets, and other precision-based artwork.
This ecosystem is useful for artists who regularly move between painting, photo compositing, typography, layout, and vector production.
Procreate
Procreate is an iPad-based illustration application designed for sketching, painting, and expressive digital artwork. Its official feature set includes tools such as QuickShape, StreamLine, Drawing Assist, brushes, gestures, and other controls intended to support mobile creative workflows.
It is particularly useful for:
- Portable sketching
- Character illustration
- Hand lettering
- Concept development
- Social media artwork
- Painterly rendering
- Time-lapse process content
Artists working on an iPad can use Apple Pencil pressure and tilt information to control supported brushes more naturally.
Clip Studio Paint
Clip Studio Paint supports illustration, concept art, comics, webtoons, and animation across Windows, macOS, iPad, iPhone, and Android. Its current tools include configurable brushes, line stabilization, perspective support, multi-page project management, animation features, and customizable 3D references.
It is a strong option for:
- Manga and comics
- Webtoons
- Character art
- Storyboarding
- Line-focused illustration
- Short animation
- Multi-page publishing
- Artists who use perspective rulers or pose references
The software is especially valuable when illustration and sequential storytelling need to remain inside one production environment.
Krita
Krita is a free and open-source application focused on digital painting and illustration. Its official documentation identifies illustration, concept art, matte painting, texture work, comics, and animation among its supported creative fields.
Its feature set includes multiple brush types, layers, drawing assistants, stabilizers, and animation tools.
Krita is a practical choice for:
- Beginners exploring digital painting
- Artists working on Windows, macOS, or Linux
- Concept art
- Comics
- Textured illustration
- Open-source creative workflows
- Studios that need customizable tools without proprietary lock-in
There Is No Universal Best Application
The best software depends on the project.
A painter may prioritize brush response. A comic creator may need page management and perspective tools. A brand designer may require scalable vectors, while a content creator might prefer portability and a simple interface.
Artists usually improve faster by learning one application deeply than by switching constantly between several tools with similar functions.
A Complete Digital Illustration Workflow
Step 1: Define the Creative Brief
Clarify the message, audience, tone, dimensions, and output before drawing.
A useful brief should answer:
- What must the viewer understand?
- Which emotion should the image create?
- Where will the artwork appear?
- Which brand elements must be included?
- What should be avoided?
- Who approves the final work?
- Which files must be delivered?
This protects the project from becoming visually impressive but strategically irrelevant.
Step 2: Conduct Visual Research
Gather references for:
- Composition
- Lighting
- Color
- Costume
- Architecture
- Anatomy
- Texture
- Cultural context
- Typography
- Historical details
- Competitor positioning
Do not copy one finished illustration. Study several sources and identify the principles that make them useful.
An annotated moodboard is more valuable than a folder of random images. Add notes explaining what each reference contributes.
Step 3: Create Thumbnail Sketches
Thumbnail sketches are small, fast composition studies.
They help the artist test:
- Focal point
- Subject scale
- Negative space
- Reading direction
- Light and dark balance
- Camera angle
- Text placement
- Background complexity
Create several different structures before committing to detail.
A five-minute thumbnail can reveal a weak composition before the artist invests hours in rendering.
Step 4: Establish the Canvas
Choose dimensions according to the final use.
For raster work, start with enough resolution for the largest planned output. Reducing a large image is usually safer than enlarging an undersized one.
For print, confirm:
- Final physical dimensions
- Required resolution
- Bleed
- Color specifications
- File format
- Safe area
- Printer requirements
For social media, prepare separate compositions when different aspect ratios significantly change the layout. Cropping one master file into every platform format may weaken the focal point.
Step 5: Build the Sketch
The sketch defines the major relationships before polishing begins.
Focus on:
- Gesture
- Proportion
- Perspective
- Silhouette
- Expression
- Shape balance
- Main light direction
- Typography placement
Keep the sketch loose enough to revise. A highly polished early drawing can make necessary changes feel more expensive than they really are.
Step 6: Organize the Layers
Use clear layer names and groups.
A useful structure might include:
- References
- Sketch
- Line art
- Background
- Midground
- Character
- Objects
- Shadows
- Lighting
- Texture
- Color adjustment
- Typography
Avoid creating hundreds of unnamed layers without a clear reason. Organization should make revision easier, not turn the file into a maze.
Step 7: Establish Values
Value describes how light or dark each area appears.
Before choosing final colors, check whether the illustration works in grayscale.
A strong value structure helps the viewer identify:
- Main subject
- Secondary elements
- Depth
- Lighting
- Visual hierarchy
- Atmosphere
Color cannot always repair a weak light-dark composition.
Step 8: Develop the Color Palette
Choose a limited palette that supports the emotional direction.
Possible approaches include:
- Warm dominant palette with cool accents
- Cool environment with warm focal point
- Monochrome with one highlight color
- Complementary contrast
- Muted natural palette
- Bright commercial palette
- Brand-controlled color system
Use color to guide attention rather than giving every object equal saturation.
Step 9: Add Light, Texture, and Depth
Details should support the composition.
Texture can communicate:
- Material
- Age
- Weather
- Surface quality
- Environment
- Mood
Use sharper details around the focal point and simplify secondary areas. When every surface receives the same level of detail, the viewer may not know where to look.
Step 10: Integrate Typography
Typography should feel like part of the illustration rather than an unrelated label placed over it at the end.
Consider:
- Text-safe area
- Contrast
- Scale
- Letter personality
- Alignment
- Interaction with the subject
- Space for localized versions
- Small-screen readability
Pair expressive illustration with a font that supports the same story. PutraCetol Studio fonts can add a distinctive voice to covers, packaging, campaign headlines, posters, and branded illustrations.
Use an expressive font for the title or logo, then keep practical information in a readable companion typeface.
Step 11: Review at Multiple Sizes
Inspect the illustration:
- At full resolution
- At normal viewing size
- As a thumbnail
- In grayscale
- On a phone
- Against light and dark interfaces
- Inside the final packaging or page layout
A detail that looks excellent at 200 percent zoom may disappear in real use.
Step 12: Export and Archive
Keep the editable source file separate from flattened exports.
A delivery folder may include:
- Layered master file
- High-resolution print file
- Web-optimized PNG or JPEG
- Transparent-background version
- Vector elements where relevant
- Thumbnail or preview
- Color variations
- Usage notes
- License records for fonts and assets
Use consistent file names and version numbers.
campaign-illustration-final-v7-revised-final2.psd is not a reliable archive system.
Essential Digital Illustration Techniques
Line Control
Line quality influences the emotional character of the artwork.
Smooth controlled lines can feel polished and precise. Rough lines create energy and texture, while changing pressure adds depth and emphasis.
Practice:
- Long confident strokes
- Curves
- Ellipses
- Parallel lines
- Tapered endings
- Thick-to-thin transitions
- Consistent repeated shapes
Line confidence develops through repetition rather than software alone.
Shape Language
Shape language uses recurring geometric or organic forms to create personality.
- Circles can feel friendly or soft.
- Squares can suggest stability.
- Triangles may communicate energy or danger.
- Long vertical forms can feel elegant.
- Irregular organic shapes suggest nature or handcraft.
A character, logo, environment, and typography system can share the same shape language to create greater visual consistency.
Perspective
Perspective makes objects feel spatially connected.
Beginners should practice:
- Horizon lines
- Vanishing points
- Boxes in space
- Overlapping forms
- Scale changes
- Atmospheric depth
- Foreshortening
Digital assistants and 3D references can help, but they should support spatial understanding rather than replace it completely.
Edge Control
Not every edge should be equally sharp.
Sharp edges attract attention and define focal details. Softer edges can communicate distance, motion, atmosphere, or lower importance.
Intentional edge variation creates depth and prevents the artwork from feeling cut out of paper.
Brush Economy
More brushes do not automatically produce better illustration.
A small set may be enough:
- Sketch brush
- Inking brush
- Opaque painting brush
- Soft blending brush
- Texture brush
- Eraser
Learning how pressure, opacity, size, and angle change one brush is often more valuable than collecting hundreds of presets.
Lighting
Lighting establishes form, mood, and hierarchy.
Define:
- Primary light source
- Shadow direction
- Light temperature
- Ambient light
- Reflected light
- Rim light where appropriate
- Material response
Lighting should remain consistent across the scene unless the inconsistency is deliberate.
Digital Illustration for Branding
A brand rarely needs only one illustration. It usually needs a visual system capable of producing many related assets.
Define:
- Character style
- Line weight
- Color palette
- Texture level
- Shape language
- Perspective rules
- Facial expressions
- Background treatment
- Typography relationship
- Animation behavior where relevant
A financial technology company may need precise geometric illustrations. A wellness brand could use soft organic forms, while a children’s product may require bolder shapes and brighter color.
The illustration style should support the company’s real position rather than imitate a popular trend without context.
Digital Illustration for Social Media
Social media artwork needs immediate clarity.
Use:
- One clear focal point
- Strong light-dark separation
- Limited text
- Recognizable colors
- Consistent framing
- Repeatable series templates
- Clear connection with the caption
Create platform-specific crops when necessary.
A vertical Story, square post, and horizontal video cover may need different subject placement even when they use the same artwork.
For text inside social graphics, maintain sufficient contrast. WCAG 2.2 specifies a contrast ratio of at least 4.5:1 for normal text and 3:1 for qualifying large text.
Digital Illustration for Publishing
Publishing requires close coordination between illustration, typography, page layout, and production.
Possible applications include:
- Book covers
- Children’s books
- Editorial features
- Magazines
- Comics
- Educational books
- Posters
- Digital publications
Illustrators should request:
- Final trim size
- Bleed
- Spine width where relevant
- Text-safe area
- Color requirements
- Delivery format
- Revision schedule
A book-cover illustration should leave enough space for the title, author name, publisher mark, and future promotional text.
Digital Illustration for Packaging
Packaging illustrations must survive physical production.
Test the artwork on:
- Curved surfaces
- Small labels
- Boxes
- Pouches
- Bottles
- Transparent materials
- Matte and glossy finishes
- Metallic effects
- Multiple product variants
Important elements should not disappear around folds, seams, caps, or product windows.
Create a clear hierarchy between:
- Brand
- Product name
- Illustration
- Flavor or variant
- Practical information
The illustration should attract attention without hiding what the product actually is.
Digital Illustration and Accessibility
Illustration can improve understanding, but it can also create barriers when essential information exists only inside a complex image.
For web and app content:
- Provide useful alternative text
- Repeat essential instructions as live text
- Maintain readable contrast
- Avoid using color as the only signal
- Keep text away from visually noisy backgrounds
- Provide captions for diagrams
- Offer text descriptions for complex information
W3C recommends using live text rather than images of text when the presentation can reasonably be created with adaptable text, because text inside an image cannot be adjusted as easily by the user.
Decorative artwork can remain visually expressive. Functional communication should remain accessible.
AI in Digital Illustration
AI can assist with:
- Brainstorming
- Reference organization
- Rough compositions
- Color exploration
- Background alternatives
- Asset variations
- Image cleanup
- Repetitive production tasks
It should not replace the artist’s responsibility for concept, visual judgment, cultural accuracy, consistency, licensing, and final approval.
Use AI-generated material as a starting point that still requires selection, correction, and transformation. Maintain records of source assets, prompts, edits, and human contributions when the work enters commercial production.
The strongest creative result comes from treating AI as one tool inside a wider illustration process rather than allowing it to define the style or message automatically.
Typography Inside Digital Illustration
Typography can become part of the artwork’s visual language.
A rounded display font may complement soft cartoon illustration. A refined serif can support fashion or editorial imagery, while a rough display face may strengthen music, sports, horror, or outdoor artwork.
When pairing illustration with typography:
- Match the emotional tone
- Protect readability
- Adjust kerning manually
- Leave enough negative space
- Avoid covering the focal point
- Test the smallest output size
- Prepare monochrome alternatives
- Confirm the appropriate license
PutraCetol Studio offers expressive type directions that can help turn a digital illustration into a more complete branded composition. The font should reinforce the artwork rather than compete with it.
Comparison
Raster vs. Vector vs. Hybrid Illustration
| Approach | Main Strength | Main Limitation | Best Applications | Typical Tools |
|---|---|---|---|---|
| Raster | Painterly detail, texture, lighting, and organic brushwork | Loses quality when enlarged beyond its resolution | Digital painting, concept art, covers, and social graphics | Photoshop, Procreate, Fresco, Krita, Clip Studio Paint |
| Vector | Scales cleanly and keeps shapes precisely editable | Can feel rigid when organic texture is central | Logos, icons, mascots, packaging, patterns, and infographics | Illustrator, Fresco vector brushes, vector-capable design tools |
| Hybrid | Combines scalable structure with natural texture | Requires organized handoffs between methods | Branding, packaging, editorial illustration, and campaign systems | Fresco with Illustrator, Photoshop with Illustrator, mixed workflows |
Adobe’s official comparison explains that raster images use pixels and support complex tonal detail, while vector artwork uses mathematical paths and remains scalable.
Digital Illustration Software Comparison
| Software | Strongest Direction | Best For | Main Workflow Advantage |
| Adobe Fresco | Painting, sketching, vector brushes, and light animation | Illustrators working across Adobe applications | Artwork can continue into Photoshop or Illustrator |
| Photoshop | Raster painting, texture, compositing, and editing | Detailed illustration and campaign production | Broad control over brushes, layers, masks, and image editing |
| Illustrator | Vector graphics and scalable artwork | Logos, flat illustration, packaging, and brand assets | Precise paths and resolution-independent output |
| Procreate | Portable raster sketching and painting | iPad illustrators and content creators | Gesture-driven interface and responsive stylus workflow |
| Clip Studio Paint | Illustration, comics, webtoons, and animation | Character artists and sequential storytellers | Page management, perspective tools, line support, and 3D references |
| Krita | Open-source painting and concept art | Beginners, independent artists, and open-source users | Free access, customizable brushes, assistants, layers, and animation |
The official product pages describe Fresco as a painting and drawing application, Procreate as an iPad creative studio, Clip Studio Paint as a multi-platform tool for illustration, comics, and animation, and Krita as a free, open-source digital-painting application.
Illustration Style Comparison
| Style | Visual Character | Strongest Use | Main Production Consideration |
| Flat vector | Clean, geometric, and scalable | Branding, infographics, UI, and packaging | Needs strong shape hierarchy |
| Painterly raster | Textured, atmospheric, and expressive | Concept art, publishing, and entertainment | Requires appropriate resolution |
| Line illustration | Clear, elegant, and economical | Editorial, packaging, fashion, and instruction | Line consistency is critical |
| Cartoon illustration | Bold, friendly, and expressive | Kids, entertainment, social content, and mascots | Silhouette and expression must remain clear |
| Collage | Layered, tactile, and experimental | Editorial, music, fashion, and culture | Source-image rights must be verified |
| Isometric illustration | Structured, spatial, and technical | Technology, architecture, and process explanation | Perspective needs consistent rules |
| Textured vector | Scalable with added physical character | Branding, posters, and packaging | Texture should not weaken small-size clarity |
Common Mistakes
The first mistake is believing that better hardware, more brushes, or expensive software will compensate for weak fundamentals. Digital tools can accelerate drawing, but they do not automatically solve composition, anatomy, perspective, color, value, or storytelling. Beginners often collect hundreds of brushes while avoiding repeated practice with simple forms and light. Choose one reliable application, learn a small set of tools thoroughly, and spend more time developing visual judgment than customizing the interface.
Another common mistake is rendering detail before the composition has been validated. Artists may spend hours painting hair, clothing texture, leaves, or background objects while the focal point, silhouette, and value structure remain unclear. Work from large decisions toward small ones. Test several thumbnails, review the artwork in grayscale, and confirm that the image still communicates at a reduced size. Detail should reward attention after the composition has already guided it.
The final mistake is ignoring the final production environment. An illustration may look excellent inside the working file but fail when printed, cropped for social media, placed behind text, or reduced onto packaging. Artists should confirm output dimensions early, keep editable source files, separate typography where practical, verify licenses for fonts and external assets, and test accessibility when the image contains essential information. A professional workflow is not finished when the artwork looks complete. It is finished when the correct files can be reproduced, understood, and used confidently.
Conclusion
Digital illustration combines traditional artistic thinking with the flexibility of modern creative technology.
Raster tools provide rich texture, lighting, and painterly control. Vector tools create precise, scalable artwork, while hybrid workflows allow artists to combine organic expression with flexible brand production.
The strongest results begin before the first polished stroke. Define the audience and output, conduct visual research, test small compositions, organize the file, establish values, develop a controlled palette, and add detail only after the visual hierarchy works.
Software should support the artist’s goals rather than dictate the style. Adobe Fresco, Photoshop, Illustrator, Procreate, Clip Studio Paint, and Krita each offer different strengths, but no application replaces observation, practice, storytelling, and creative judgment.
Digital illustration can strengthen branding, publishing, packaging, social media, entertainment, education, and product design. Typography can complete that system by giving the artwork a recognizable title, campaign voice, or brand identity.
A carefully selected PutraCetol font can help connect illustration with logos, headlines, packaging, posters, and promotional content. The strongest pairing allows image and type to tell one consistent story.
Digital illustration is not defined by a particular device or visual style. It is a creative process in which ideas are shaped, tested, refined, and prepared for the way modern audiences experience visual communication.
Explore these fonts and many more at PutraCetol.com to build a business identity that looks professional, trustworthy, and memorable.
Additionally, if you want to explore some free typography options, you can check out Putracetol Studio on Dafont. Happy reading and designing!